企业微信应用接入GPT实现AI对话
Django实现企业微信与GPT回调接口
背景:近期用fastgpt和公司自研的llmops搭建了知识问答机器人,通过应用发布后实现在企业微信中进行GPT对话,下面主要记录企业微信消息回调部分的实现。
在开始之前我们先观察企业微信回调接口文档:https://developer.work.weixin.qq.com/document/path/90238
根据文档我们知道企业微信消息回调的流程,再结合我们实际应用场景,大致流程如下:
企业微信客户端发送消息给应用
企业微信应用端将消息内容通过POST发送给回调接口
回调接口收到消息后解析出用户ID和明文消息
将明文消息转发给FastGPT接口,GPT处理消息
FastGPT响应回复,返回给回调接口
回调接口通过消息接口将响应内容回复给对应用户
示意图如下:
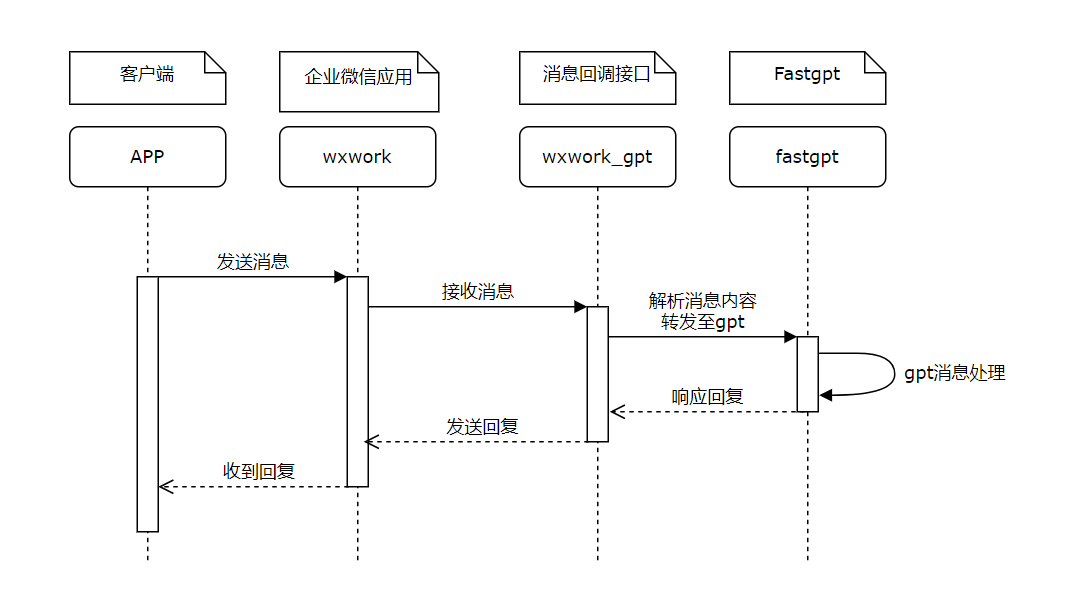
在整个流程中,我们需要关注wxwork、wxwork_gpt、fastgpt这三个环节,下面依次实现每个业务环节
一、接收客户端消息
从文档中得知,首先在应用后台中开启API接收消息,但在配置接口URL时,企业微信会向接口发送一个GET请求用来校验URL有效性,所以我们先实现这个接口的校验
1.1 校验接口
在DRF中新增一个APIView,指定GET方法,然后按照文档要求接收
msg_signature、timestamp、nonce、echostr四个参数class WxWorkGptView(APIView): authentication_classes = [] def get(self, request): signature = request.GET.get('msg_signature', '') timestamp = request.GET.get('timestamp', '') nonce = request.GET.get('nonce', '') echo_str = request.GET.get('echostr', '') return HttpResponse("success!")在拿到参数后,我们需要对参数进行解密校验,具体的校验规则详见企业微信文档,我们这里直接使用企业微信封装好的加解密工具类:
WXBizMsgCrypt3:https://github.com/sbzhu/weworkapi_python/blob/master/callback/WXBizMsgCrypt3.py
这里有个坑,该工具依赖pycrypto第三方库,安装依赖后会报错ImportError: No module named 'Crypto',这是由于Windows下文件夹命名大小写问题导致的,解决方法是用另一个第三方库pycryptodome替代

pip install pycryptodome
安装依赖后,把封装好的WXBizMsgCrypt3.py放到项目的utils目录下,并将WXBizMsgCrypt类导入到APIView中,然后我们还需要实例化一下对象
from api.utils.WXBizMsgCrypt3 import WXBizMsgCrypt sCorpID = "wwxxxxxxxxxxxxxx" sToken = "xxxxxxxxxxxxxxxx" sEncodingAESKey = "xxxxxxxxxxxxxxxxxxxx" wxcpt = WXBizMsgCrypt(sToken, sEncodingAESKey, sCorpID) 实例WXBizMsgCrypt类需要传入
sToken, sEncodingAESKey, sCorpID三个参数:sToken:企业微信应用后台生成token
sEncodingAESKey:企业微信应用后台生成AESKey
sCorpID:企业微信CorpID
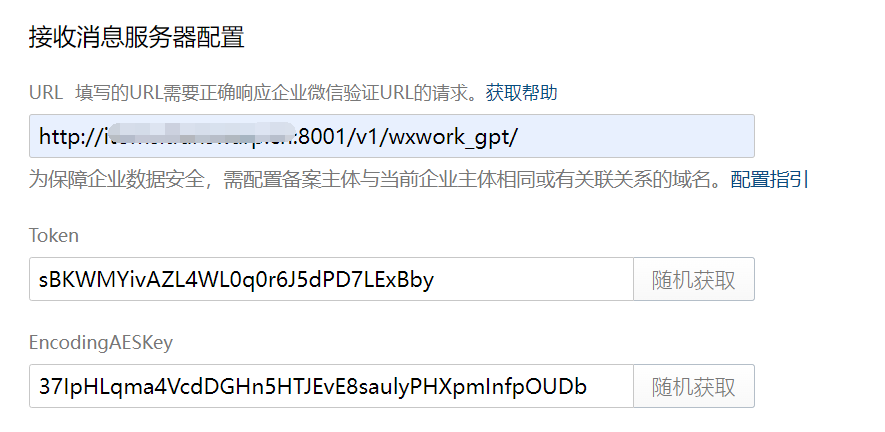
打开企业微信应用后台,设置API接收消息,预填入我们回调接口的URL,生成Token和AESKey,这个时候先不要保存,因为此时接口还没有上线,校验无法通过会导致保存失败。
实例化WXBizMsgCrypt后,我们将调用VerifyURL方法,传入
msg_signature、timestamp、nonce、echostr四个参数值,得到ret返回码和sEchoStr明文消息,将明文消息响应给GET请求即可完成校验校验接口代码如下:
from rest_framework.views import APIView from django.http import HttpResponse from api.utils.WXBizMsgCrypt3 import WXBizMsgCrypt import xml.etree.cElementTree as ET from api.utils import fastgpt, wx_work # 实例化工具类 sCorpID = "wwxxxxxxxxxxxxxx" sToken = "xxxxxxxxxxxxxx" sEncodingAESKey = "xxxxxxxxxxxxxxxxxxxxxxxxxxxx" wxcpt = WXBizMsgCrypt(sToken, sEncodingAESKey, sCorpID) class WxWorkGptView(APIView): authentication_classes = [] def get(self, request): signature = request.GET.get('msg_signature', '') timestamp = request.GET.get('timestamp', '') nonce = request.GET.get('nonce', '') echo_str = request.GET.get('echostr', '') # 校验请求 ret, sEchoStr = wxcpt.VerifyURL(signature, timestamp, nonce, echo_str) if (ret != 0): # 校验失败返回错误码 return HttpResponse("ERR: VerifyURL ret: " + str(ret)) # 校验成功返回明文内容 return HttpResponse(sEchoStr)接口上线后我们可以进行测试,这里用到
[企业微信开发者中心] https://developer.work.weixin.qq.com/resource/devtool
提供的回调测试工具,填入接口地址和参数,输入任意字符到EchoStr,调用接口后获取到一串请求地址
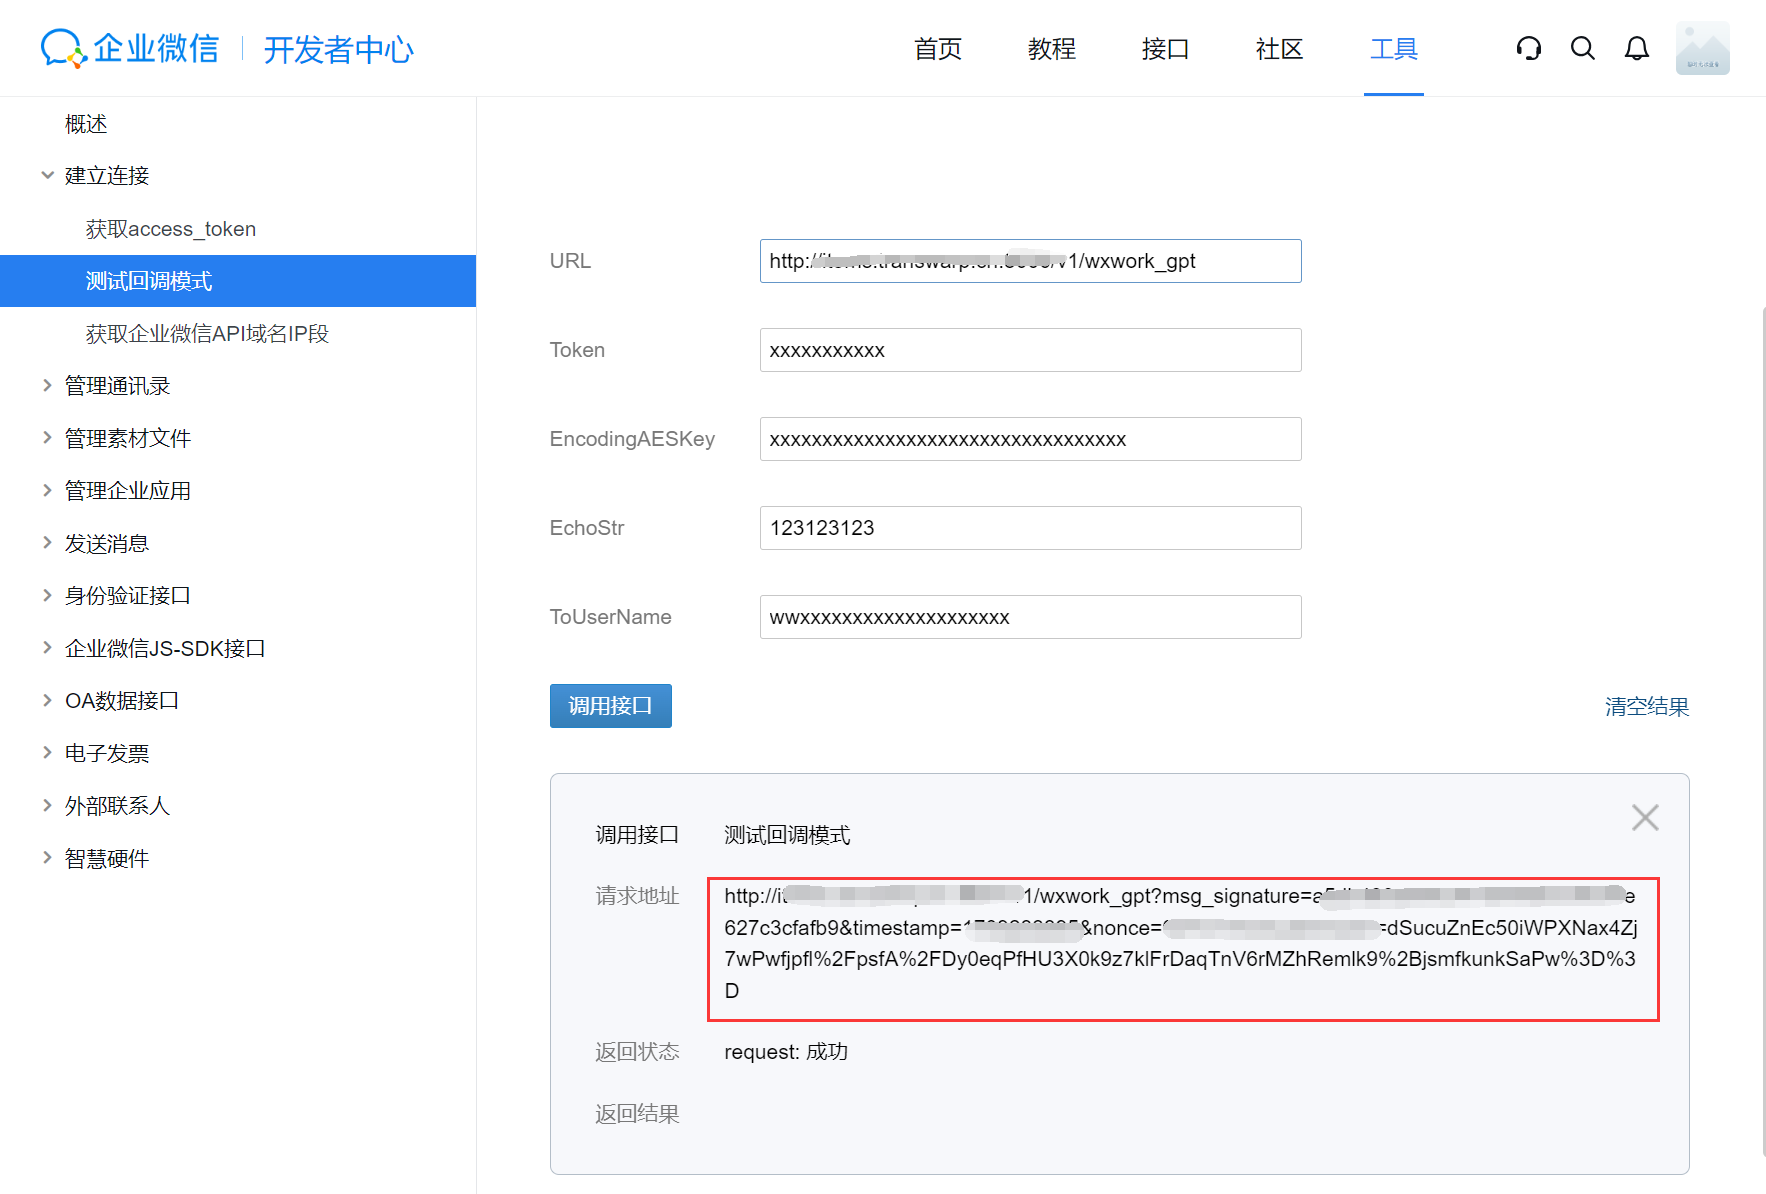
我们使用Postman向地址发送GET请求,接口返回我们上面输入的EchoStr内容,则表明接口验证成功,否则返回错误码。
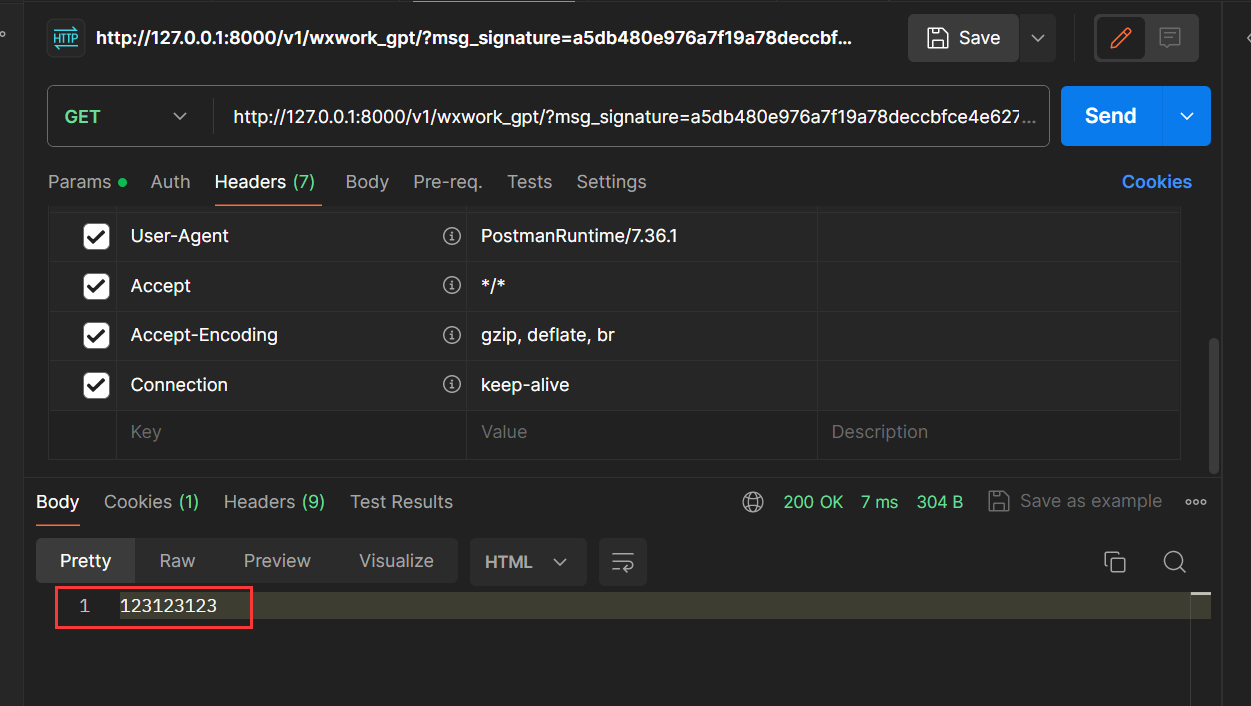
完成测试后,将完整的接口公网URL保存到企业微信应用后台,此时点击保存即可完成校验
1.2 接收消息
接口校验完成后,根据文档要求,我们还需要提供一个POST接口用来接收企业微信发送的请求,该请求体中携带了xml消息载荷,对xml进行解构即可获取消息内容
在上面的APIView中新增一个post接口,首先获取
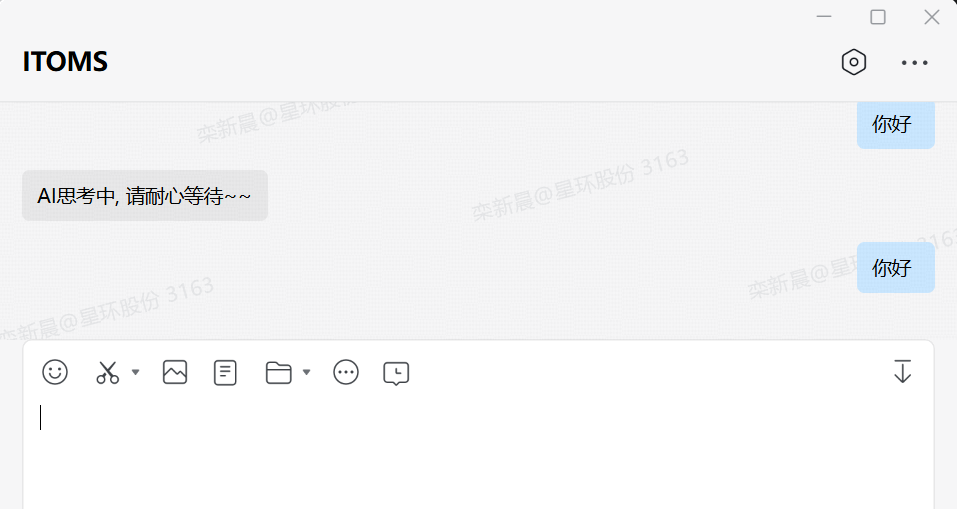
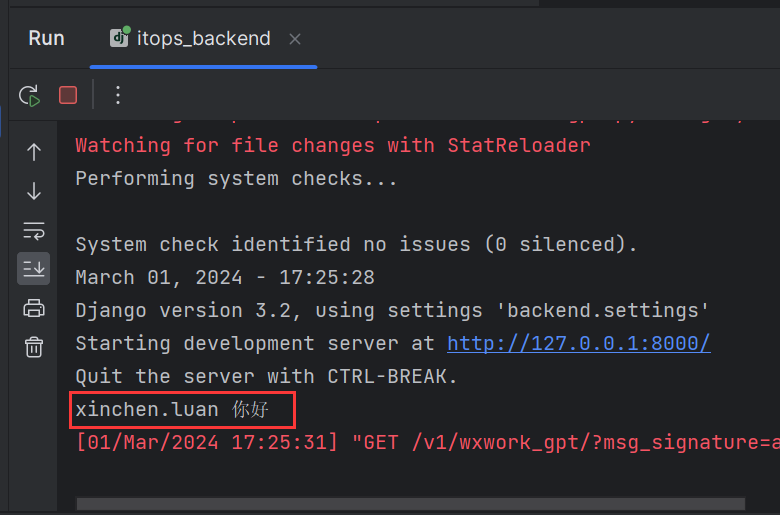
msg_signature、timestamp、nonce三个URL参数,然后提取请求体,将参数和请求体传入工具类中的DecryptMsg方法,即可得到ret返回码和xml消息class WxWorkGptView(APIView): authentication_classes = [] def post(self, request): sReqMsgSig = request.GET.get('msg_signature', '') sTimeStamp = request.GET.get('timestamp', '') sNonce = request.GET.get('nonce', '') sReqData = request.body # 校验请求体 ret, sMsg = wxcpt.DecryptMsg(sReqData, sReqMsgSig, sTimeStamp, sNonce) if (ret != 0): return HttpResponse("ERR: DecryptMsg ret: " + str(ret)) # 得到xml消息体 xml_tree = ET.fromstring(sMsg) # 获取消息内容和消息来源者ID,输出到控制台 from_user = xml_tree.find('FromUserName').text msg_content = xml_tree.find('Content').text print(from_user,msg_content) return HttpResponse('', status=200)此时我们使用企业微信应用发送消息,即可获取消息内容以及消息来源者ID
二、应用回复消息
官网文档:https://developer.work.weixin.qq.com/document/path/90236
这一步只需要实现企业微信应用推送消息给用户,不存在回调,所以相对简单点,下面我们写个工具类
该工具类主要实现两个功能,一是get_access_token获取token,这里其实可以缓存到Redis中避免重复调用,我这里简化操作直接记录过期时间了,二是send发送消息给指定用户,类似的代码网上有很多,这里就不详细解释了,下面直接上代码:
import requests import datetime from typing import List from backend import settings UPLOAD_URL = 'https://qyapi.weixin.qq.com/cgi-bin/media/upload' SEND_URL = 'https://qyapi.weixin.qq.com/cgi-bin/message/send' TOKEN_URL = 'https://qyapi.weixin.qq.com/cgi-bin/gettoken' class WxWork: access_token: str = None access_token_expires_time: datetime.datetime = None def __init__(self): self.corpid = settings.WXWORK['CORPID'] self.appid = settings.WXWORK['APPID'] self.secret = settings.WXWORK['SECRET'] self.access_token = self.get_access_token() def get_access_token(self): if self.access_token_expires_time and self.access_token and datetime.datetime.now() < self.access_token_expires_time: return self.access_token params = { 'corpid': self.corpid, 'corpsecret': self.secret } response = requests.get( TOKEN_URL, params=params) js: dict = response.json() access_token = js.get('access_token') if access_token is None: raise Exception('获取 token 失败 请确保相关信息填写的正确性') self.access_token = access_token self.access_token_expires_time = datetime.datetime.now( ) + datetime.timedelta(seconds=js.get('expires_in') - 60) return access_token def send(self, msg_type: str, users: List[str], content: str = None): userid_str = '|'.join(users) access_token = self.get_access_token() data = { 'touser': userid_str, 'msgtype': msg_type, 'agentid': self.appid, msg_type: { 'content': content, }, 'safe': 0, 'enable_id_trans': 1, 'enable_duplicate_check': 0, 'duplicate_check_interval': 1800 } params = { 'access_token': access_token } response = requests.post( SEND_URL, params=params, json=data) if response.json()['errmsg'] == 'ok': return True return response.json()['errmsg']工具类完成后,我们在回调接口中调用,实现接收用户消息后主动回复消息给用户
class WxWorkGptView(APIView):
    authentication_classes = []

    def post(self, request):
        sReqMsgSig = request.GET.get('msg_signature', '')
        sTimeStamp = request.GET.get('timestamp', '')
        sNonce = request.GET.get('nonce', '')
        sReqData = request.body
        ret, sMsg = wxcpt.DecryptMsg(sReqData, sReqMsgSig, sTimeStamp, sNonce)
        if (ret != 0):
            return HttpResponse("ERR: DecryptMsg ret: " + str(ret))
        xml_tree = ET.fromstring(sMsg)
        from_user = xml_tree.find('FromUserName').text
        msg_content = xml_tree.find('Content').text

        # 实例化工具类,调用send,传入消息和接收消息用户ID
        wx = wx_work.WxWork()
        wx.send(msg_type='text', users=[from_user], content="AI思考中, 请耐心等待~~")

        return HttpResponse('', status=200)
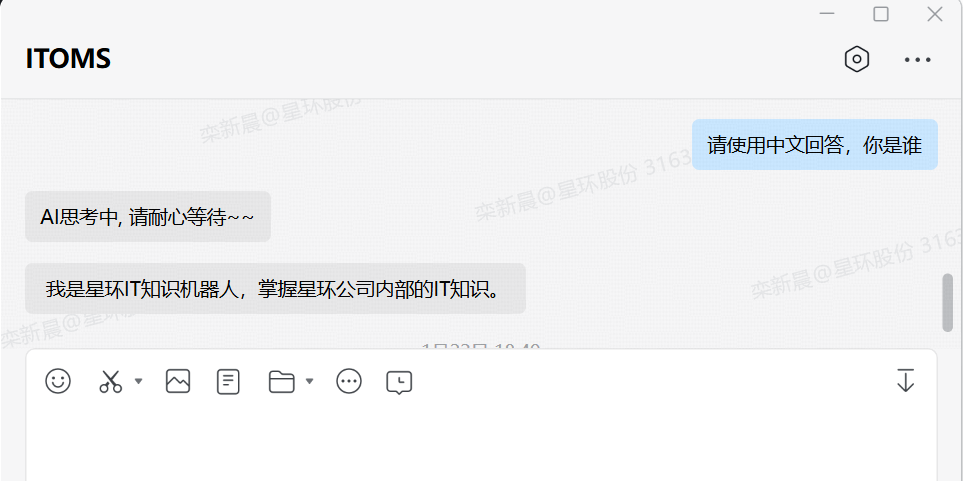
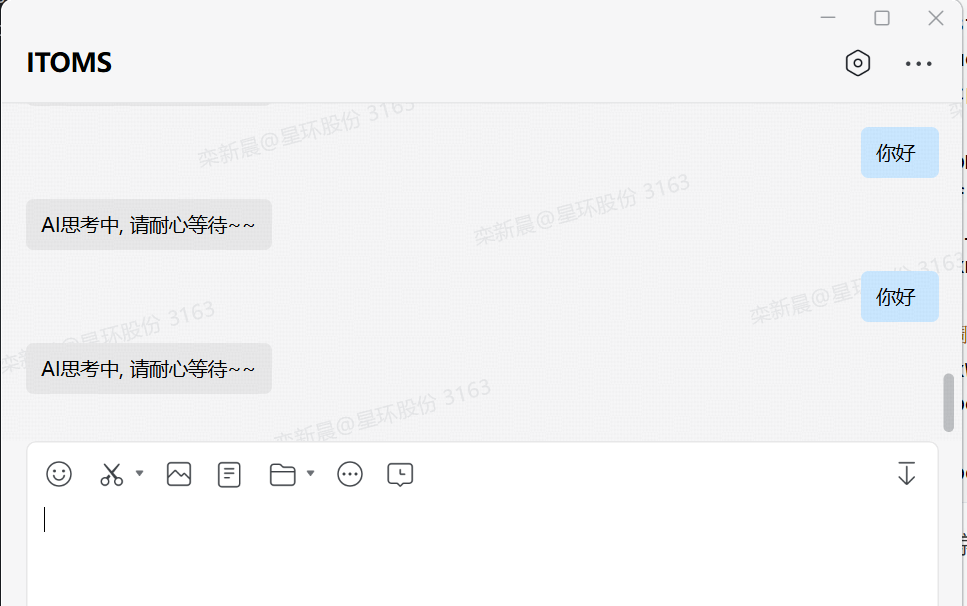
此时客户端发送消息给应用后就会得到回复,效果如下
三、接入GPT
这里我们使用了fastgpt,搭建过程在此不作详述,下面实现fastgpt的对话工具类
send_gpt_message接收消息内容和对话id两个参数,对话ID是防止多会话冲突,传入参数后等待返回gpt回复即可。
import requests import json from backend import settings def send_gpt_message(message, chatid): url = settings.FASTGPT['URL'] headers = { 'Content-Type': 'application/json', 'Authorization': 'Bearer ' + settings.FASTGPT['TOKEN'] } payload = json.dumps({ "chatId": chatid, "stream": False, "detail": False, "messages": [ { "content": message, "role": "user" } ] }) response = requests.post(url, headers=headers, data=payload) result_data = response.json().get('choices')[0].get('message').get('content') return result_datafastgpt工具类完成后,我们引入到回调接口中
class WxWorkGptView(APIView):
    authentication_classes = []

    def post(self, request):
        sReqMsgSig = request.GET.get('msg_signature', '')
        sTimeStamp = request.GET.get('timestamp', '')
        sNonce = request.GET.get('nonce', '')
        sReqData = request.body
        ret, sMsg = wxcpt.DecryptMsg(sReqData, sReqMsgSig, sTimeStamp, sNonce)
        if (ret != 0):
            return HttpResponse("ERR: DecryptMsg ret: " + str(ret))
        xml_tree = ET.fromstring(sMsg)
        from_user = xml_tree.find('FromUserName').text
        msg_content = xml_tree.find('Content').text
        wx = wx_work.WxWork()
        wx.send(msg_type='text', users=[from_user], content="AI思考中, 请耐心等待~~")

        # 发送消息内容到gpt,获取gpt响应内容
        gpt_response = fastgpt.send_gpt_message(msg_content, from_user)
        # 将gpt响应回复给用户,完成对话
        wx.send(msg_type='text', users=[from_user], content=gpt_response)

        return HttpResponse('', status=200)
至此企业微信回调接口与GPT对话完成
