Hadoop-HDFS单机部署小记
单机伪集群部署
配置环境
vim /etc/hosts ``` 172.16.30.134 hadoop1 ``` # 配置本机免密 ssh-keygen ssh-copy-id hadoop1下载jdk和hadoop安装包
wget https://dlcdn.apache.org/hadoop/common/hadoop-3.4.0/hadoop-3.4.0.tar.gz
wget https://javadl.oracle.com/webapps/download/AutoDL?BundleId=244045_89d678f2be164786b292527658ca1605
安装
mv jdk1.8.0_281/ /opt/jdk mv hadoop-3.4.0/ /opt/hadoop cat ~/.bash_profile ``` export JAVA_HOME=/opt/jdk export PATH=$JAVA_HOME/bin:$PATH export HADOOP_HOME=/opt/hadoop export PATH=$HADOOP_HOME/bin:$HADOOP_HOME/sbin:$PATH ``` source ~/.bash_profile java -version hadoop version vim /opt/hadoop/etc/hadoop/hadoop-env.sh ``` export JAVA_HOME=/opt/jdk ``` mkdir -p /data/hadoop/tmp mkdir -p /data/hadoop/hdfs/name mkdir -p /data/hadoop/hdfs/d mkdir -p /data/hadoop/log cd /opt/hadoop/etc/hadoop/ vim core-site.xml <configuration> <property> <name>fs.defaultFS</name> <value>hdfs://hadoop1:9000</value> </property> <property> <name>hadoop.tmp.dir</name> <value>file:/data/hadoop/tmp</value> </property> </configuration> vim hdfs-site.xml <configuration> <property> <name>dfs.namenode.http-address</name> <value>hadoop1:50070</value> </property> <property> <name>dfs.namenode.secondary.http-address</name> <value>hadoop1:50090</value> </property> <property> <name>dfs.namenode.name.dir</name> <value>file:/data/hadoop/hdfs/name</value> </property> <property> <name>dfs.datanode.data.dir</name> <value>file:/data/hadoop/hdfs/data</value> </property> <property> <name>dfs.replication</name> <value>1</value> </property> </configuration>启动Hadoop
# 首次启动初始化 hdfs namenode -format # root用户启动 export HDFS_NAMENODE_USER="root" export HDFS_DATANODE_USER="root" export HDFS_SECONDARYNAMENODE_USER="root" # 启动hdfs start-dfs.sh # 查看进程 jps # 查看hdfs报告 hdfs dfsadmin -report
MapReduce测试
略HDFS测试
hdfs dfs -mkdir -p /user/root
hdfs dfs -mkdir input
# 上传文件到input目录
hadoop fs -put ./etc/hadoop/*.xml input
# 列出目录
hadoop fs -ls input
# 取出文件到本地
hadoop fs -get /user/root/input/core-site.xml .
# 远端取出文件
hadoop fs -get hdfs://hadoop1:9000/user/root/input/core-site.xmlWeb文件浏览
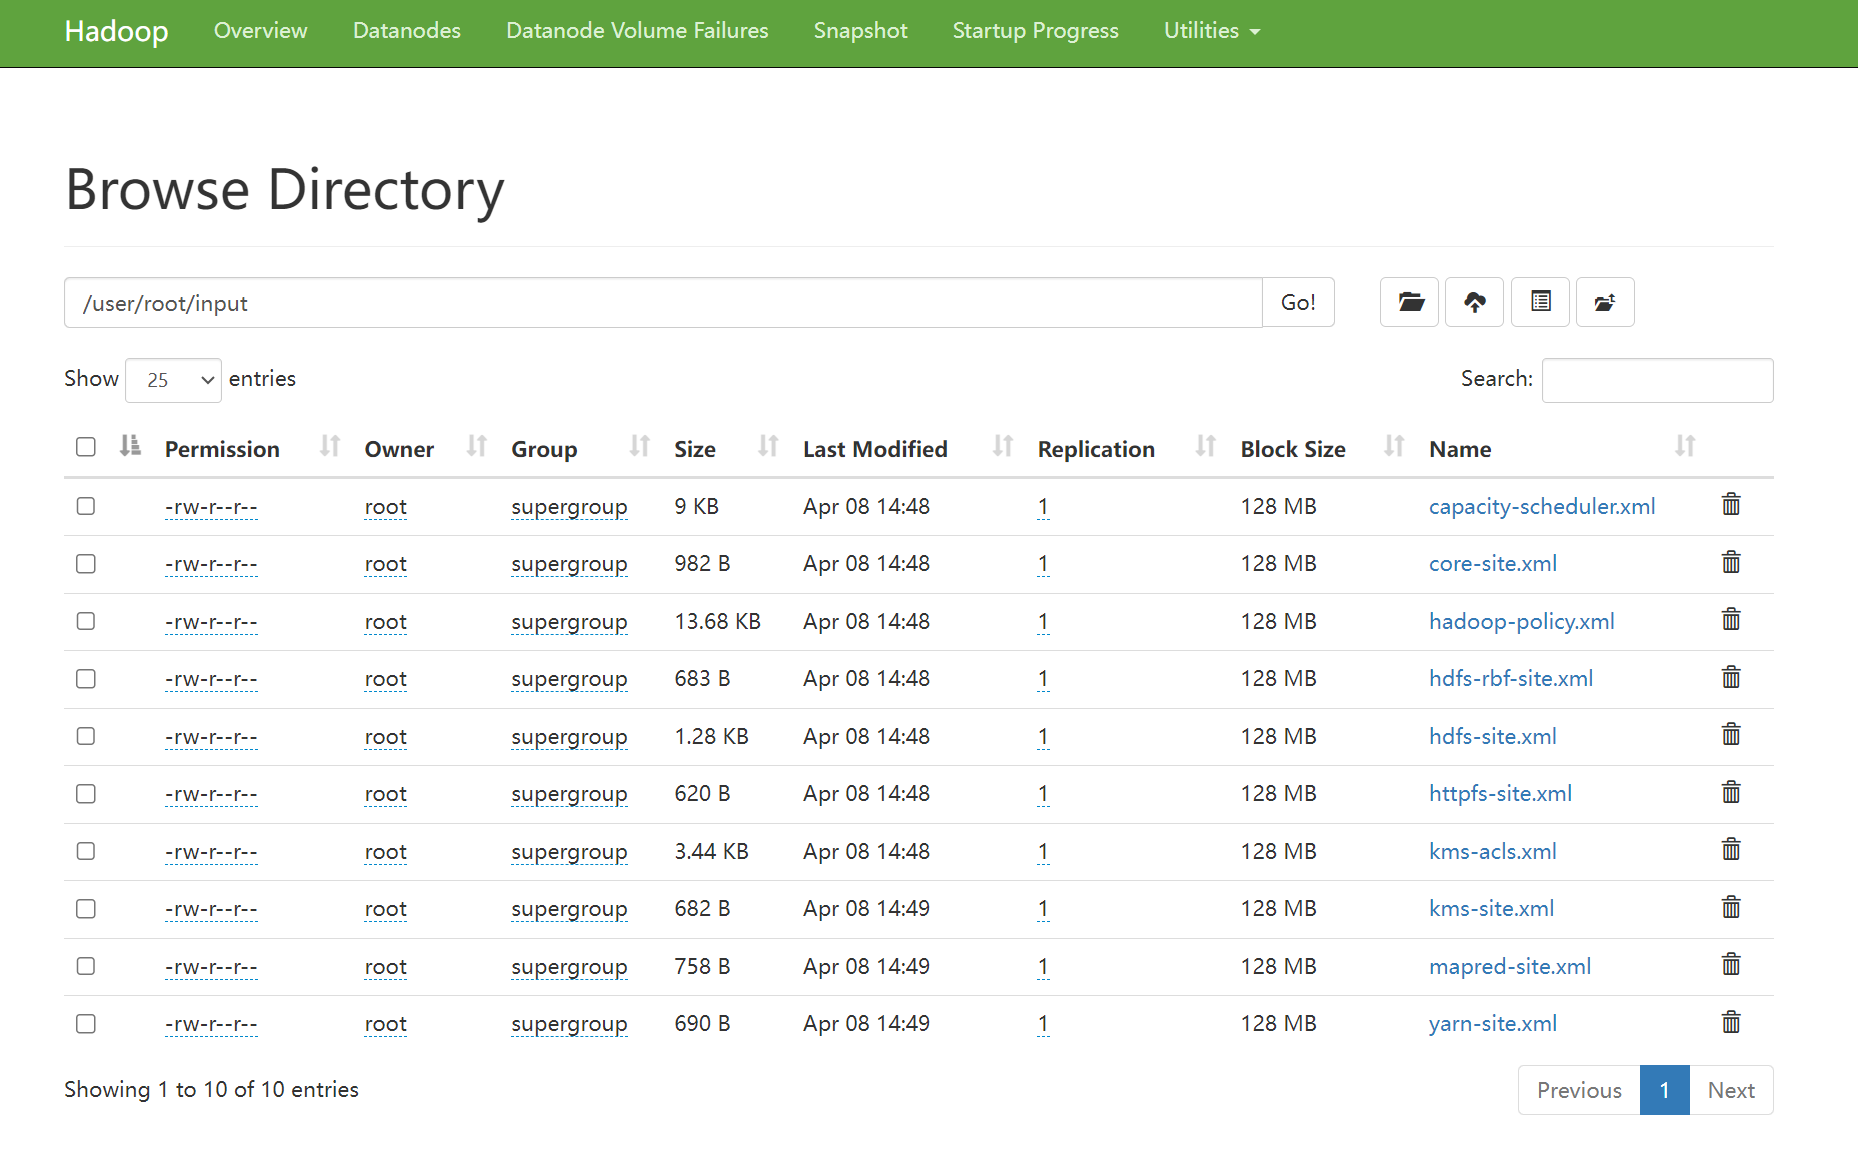
配置NFS Gateway
vim core-site.xml
```
<property>
<name>hadoop.proxyuser.root.groups</name>
<value>*</value>
<description>
The 'nfsserver' user is allowed to proxy all members of the 'users-group1' and
'users-group2' groups. Note that in most cases you will need to include the
group "root" because the user "root" (which usually belonges to "root" group) will
generally be the user that initially executes the mount on the NFS client system.
Set this to '*' to allow nfsserver user to proxy any group.
</description>
</property>
<property>
<name>hadoop.proxyuser.root.hosts</name>
<value>*</value>
<description>
This is the host where the nfs gateway is running. Set this to '*' to allow
requests from any hosts to be proxied.
</description>
</property>
```
vim hdfs-site.xml
```
<property>
<name>nfs.superuser</name>
<value>root</value>
</property>
<property>
<name>dfs.namenode.accesstime.precision</name>
<value>3600000</value>
<description>The access time for HDFS file is precise upto this value.
The default value is 1 hour. Setting a value of 0 disables
access times for HDFS.
</description>
</property>
<property>
<name>nfs.dump.dir</name>
<value>/data/hadoop/tmp/.hdfs-nfs</value>
</property>
<property>
<name>nfs.exports.allowed.hosts</name>
<value>* rw</value>
</property>
```
vim log4j.properties
```
log4j.logger.org.apache.hadoop.hdfs.nfs=DEBUG
log4j.logger.org.apache.hadoop.oncrpc=DEBUG
```# 重启hdfs
stop-dfs.sh
start-dfs.sh
hadoop-daemon.sh start portmap
hadoop-daemon.sh start nfs3
rpcinfo -p 172.16.30.134
# 客户端挂载
mount -t nfs 172.16.30.134:/ /mnt/hadoop/附:容量速算
容量计算
存储容量 = 数据块大小 * 数据块数量 * 副本数量内存计算
# 1GB内存可以管理百万个block文件
# 400TB数据,4节点集群,双副本
数据块数量 = 数据量 / (块大小 * 副本数量)